A Quick Usage Example
Now you may want to see Laravel-Parse in action? So lets tackle down a silly example in order to review how Laravel-Parse works. You will learn how to create, modify and delete a single row in order to see how Laravel-Parse interacts with your application.
Situation
At this point you will need a running Parse and Laravel environment as described in the previous chapters. The following parts will be required in order to continue with this example:
- Running MongoDB
- Running Parse Server
- Running Parse Dashboard
- Running Laravel Application (v.5.3.*)
- Installation of Laravel-Parse (v.1.0.*)
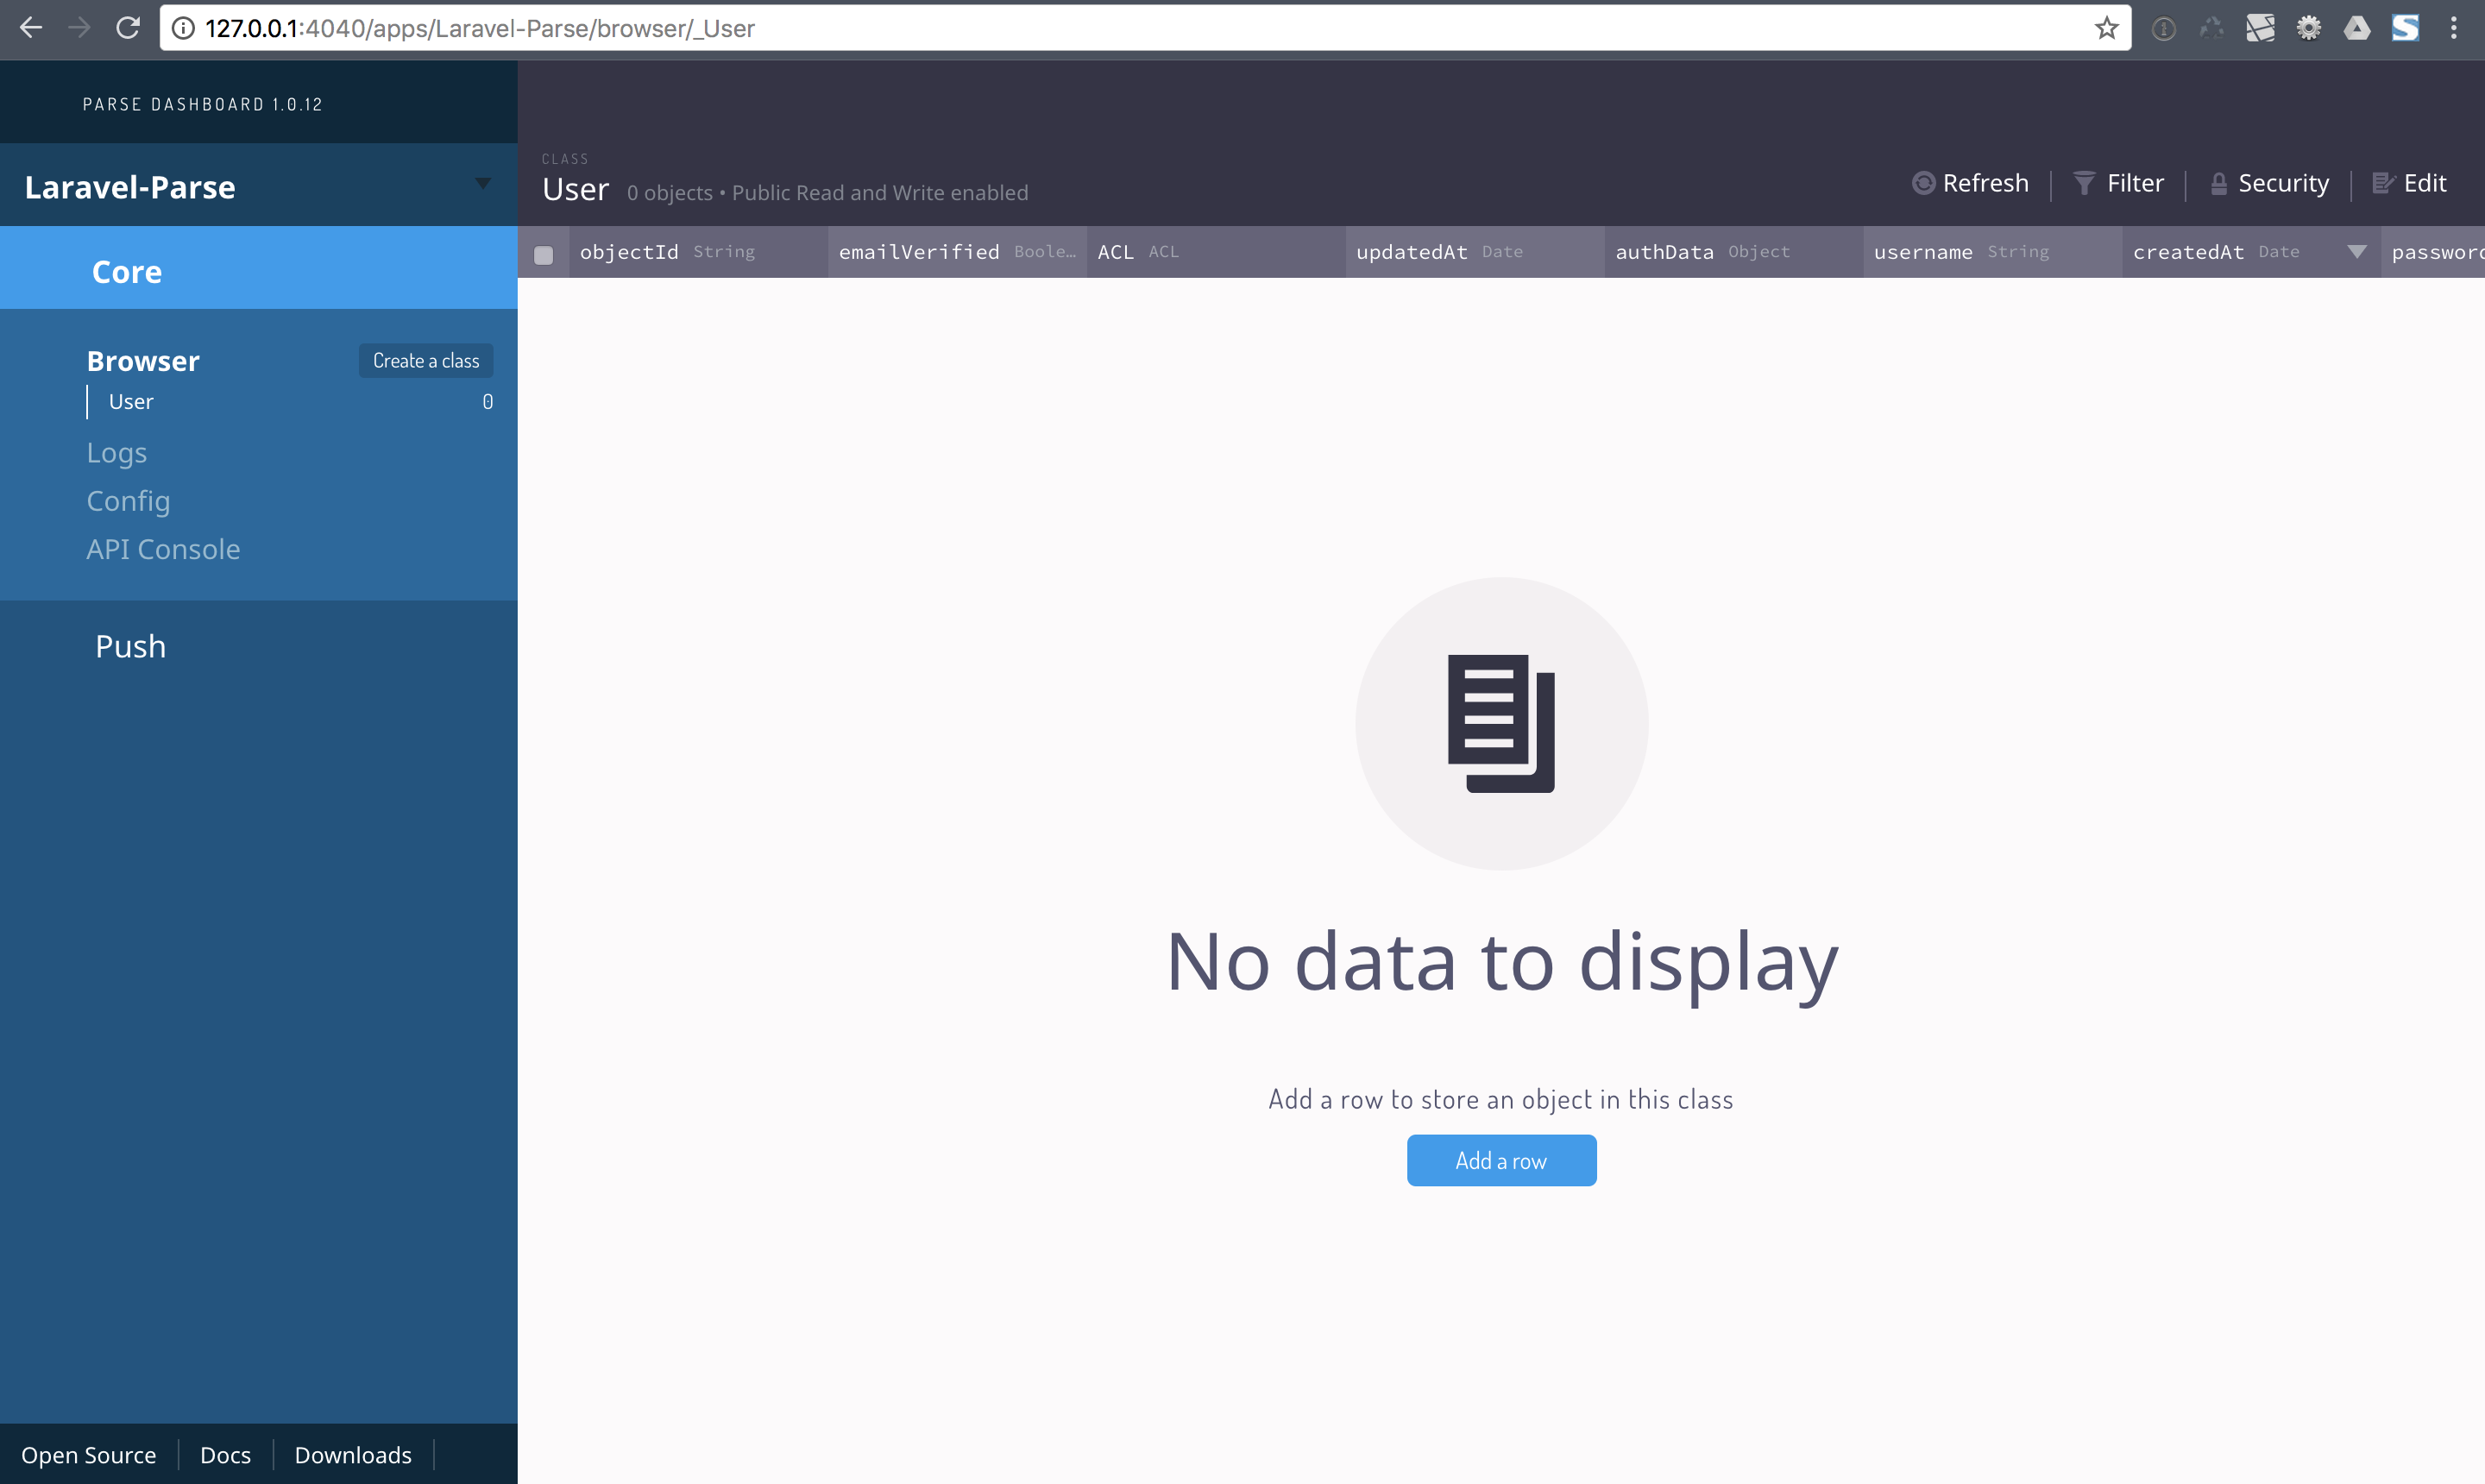
After a fresh Parse installation you will only have an empty User Parse class at the beginning:
In this tutorial you will create a new Parse class called Test. The Test class whether exists as an ORM model nor a Parse class at the moment. So you will need to create them - lets see how:
Step-01: Defining Model
The easiest way to generate a new model is to use the php artisan parse:model command:
php artisan parse:model Test
This command will generate, a new Object Model (app/Test.php) using the Laravel-Parse model stub:
<?php namespace App;

use Sirthxalot\Parse\ObjectModel;

class Test extends ObjectModel
{}
Step-02: Create new Entry
Lets misuse the web route (routes/web.php) in order to create a new entry. Add the following route to your Laravel web routes file to create a new entry:
<?php

Route::get('/parseTest', function () {
    $parseTestClass = App\Test::create([
        'number' => 4,
        'boolean' => true,
        'string' => 'a regular string',
        'array' => [1, 2]
    ]);

    return 'Created new Test entry!';
});
Lets open /parseTest to see what we will get? Ohh what a pity, you probably ran into an error:
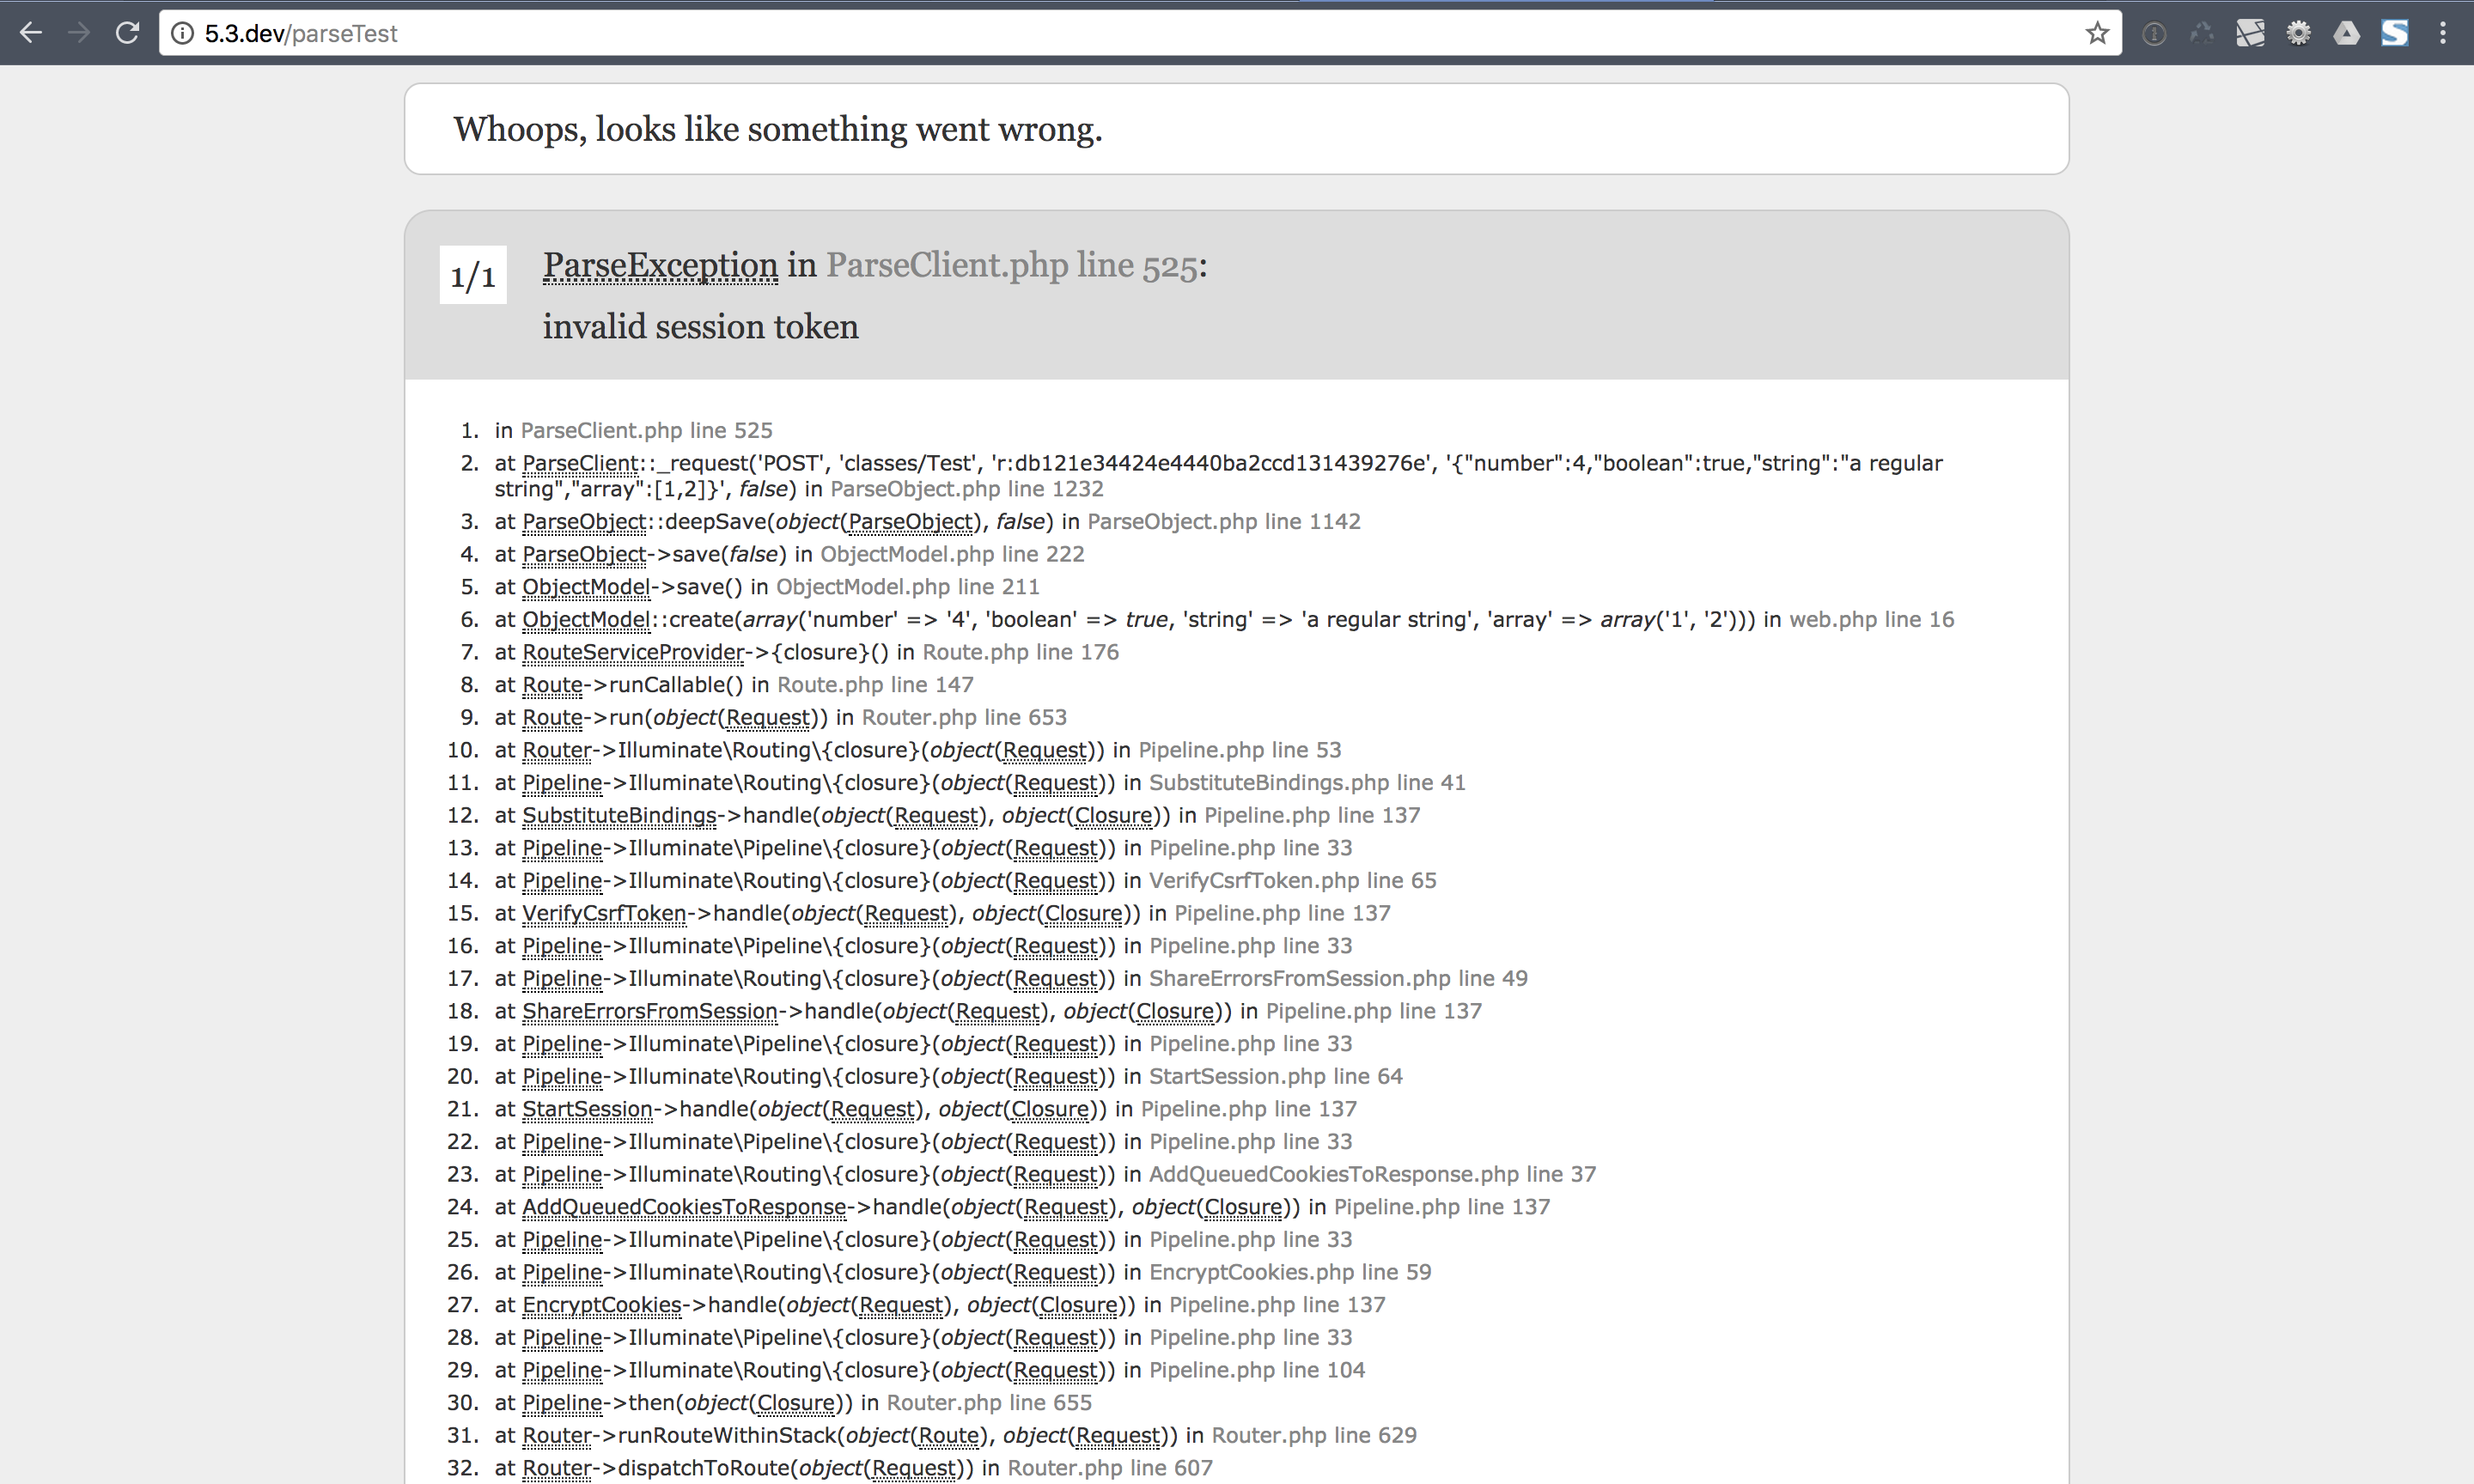
Hmmm ... But why do we have an error? Smart folks may say: “Hey we try to store data into a non existing Parse class! Don’t we need to create the Parse class first?”
Good point but the answer is: “No - You don’t have to create the Parse class this can be done by Laravel-Parse automatically.” So whats the problem anyway?
The problem is that Laravel-Parse doesn’t have the permission to create the new Parse class.
This can be a session problem, a problem with the ACL set in the Parse class or in most cases a missing master key.
The solution is to determine the master key usage within our model.
This can be done by adding the static defaultUseMasterKey attribute to our model:
<?php namespace App;

use Sirthxalot\Parse\ObjectModel;

class Test extends ObjectModel
{
    protected static $defaultUseMasterKey = true;
}
Save and refresh the /parseTest page - now the string Created new Test entry! should occur. This means that the Test Parse class has been created and that you have added a new entry to it:
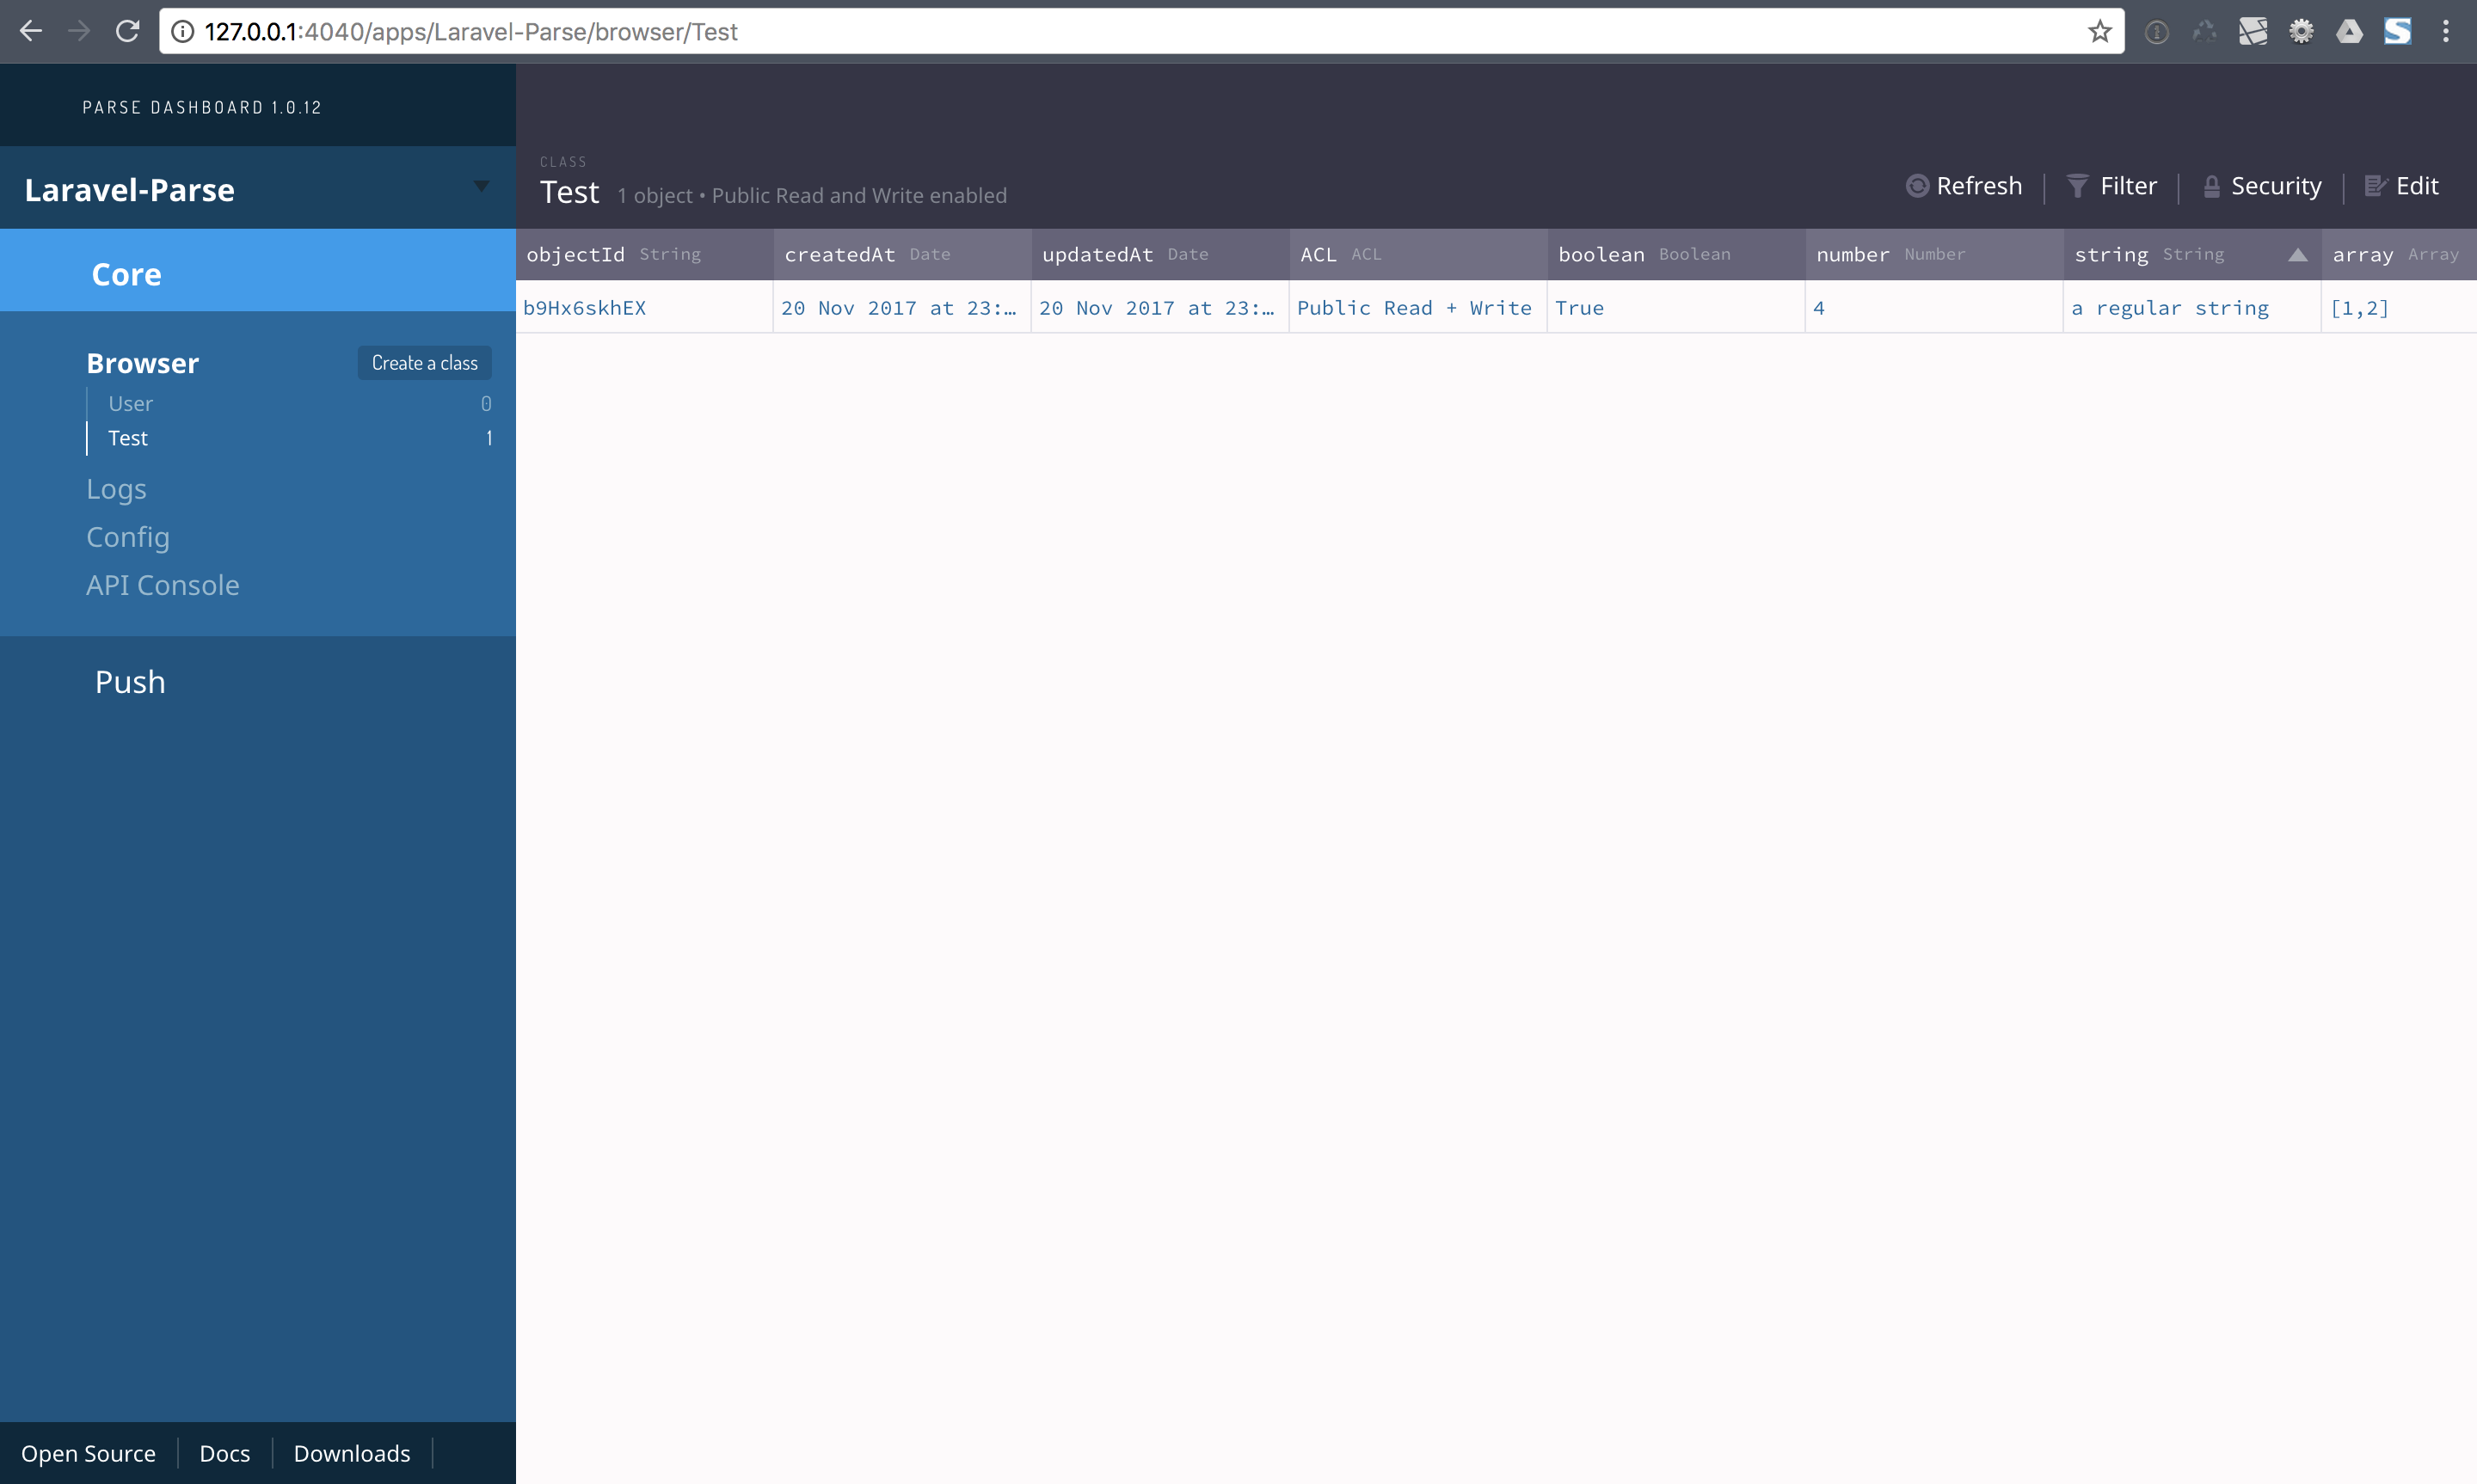
If we dive into this a little bit deeper than you might see that Laravel-Parse was smart enough to create the fields using the correct type.
Step-03: Modify Entry
Now that you will have an entry within your Test Parse class, lets see how we can modify it. In my case I have an entry with the following objectId which will be used within Parse to identify entries: b9Hx6skhEX. So this is the guy I want to modify, in your case the objectId most likely differs so checkout your Parse Dashboard and use your own objectId for the following examples.
And again, use the web route to edit the entry:
<?php

Route::get('/parseTest/edit/{id}', function ($id) {
    $parseTestClass = App\Test::findOrFail($id);
    $parseTestClass->number = 10;
    $parseTestClass->boolean = false;
    $parseTestClass->string = 'no strings attached';
    $parseTestClass->array = [3, 4];
    $parseTestClass->save();

    return 'DS ' . $id . ' has been modified!';
});
When now hitting the edit url in the browser, no error should occur and you should see something like: DS b9Hx6skhEX has been modified!. A quick peak into the Parse Dashboard approves this assumption:

But did you see that you are using AppTest::findOrFail($id) to get the Parse object? So what happens if you will use a non existing objectId to edit:
/parseTest/edit/1 will end in a No query results for model ... exception:
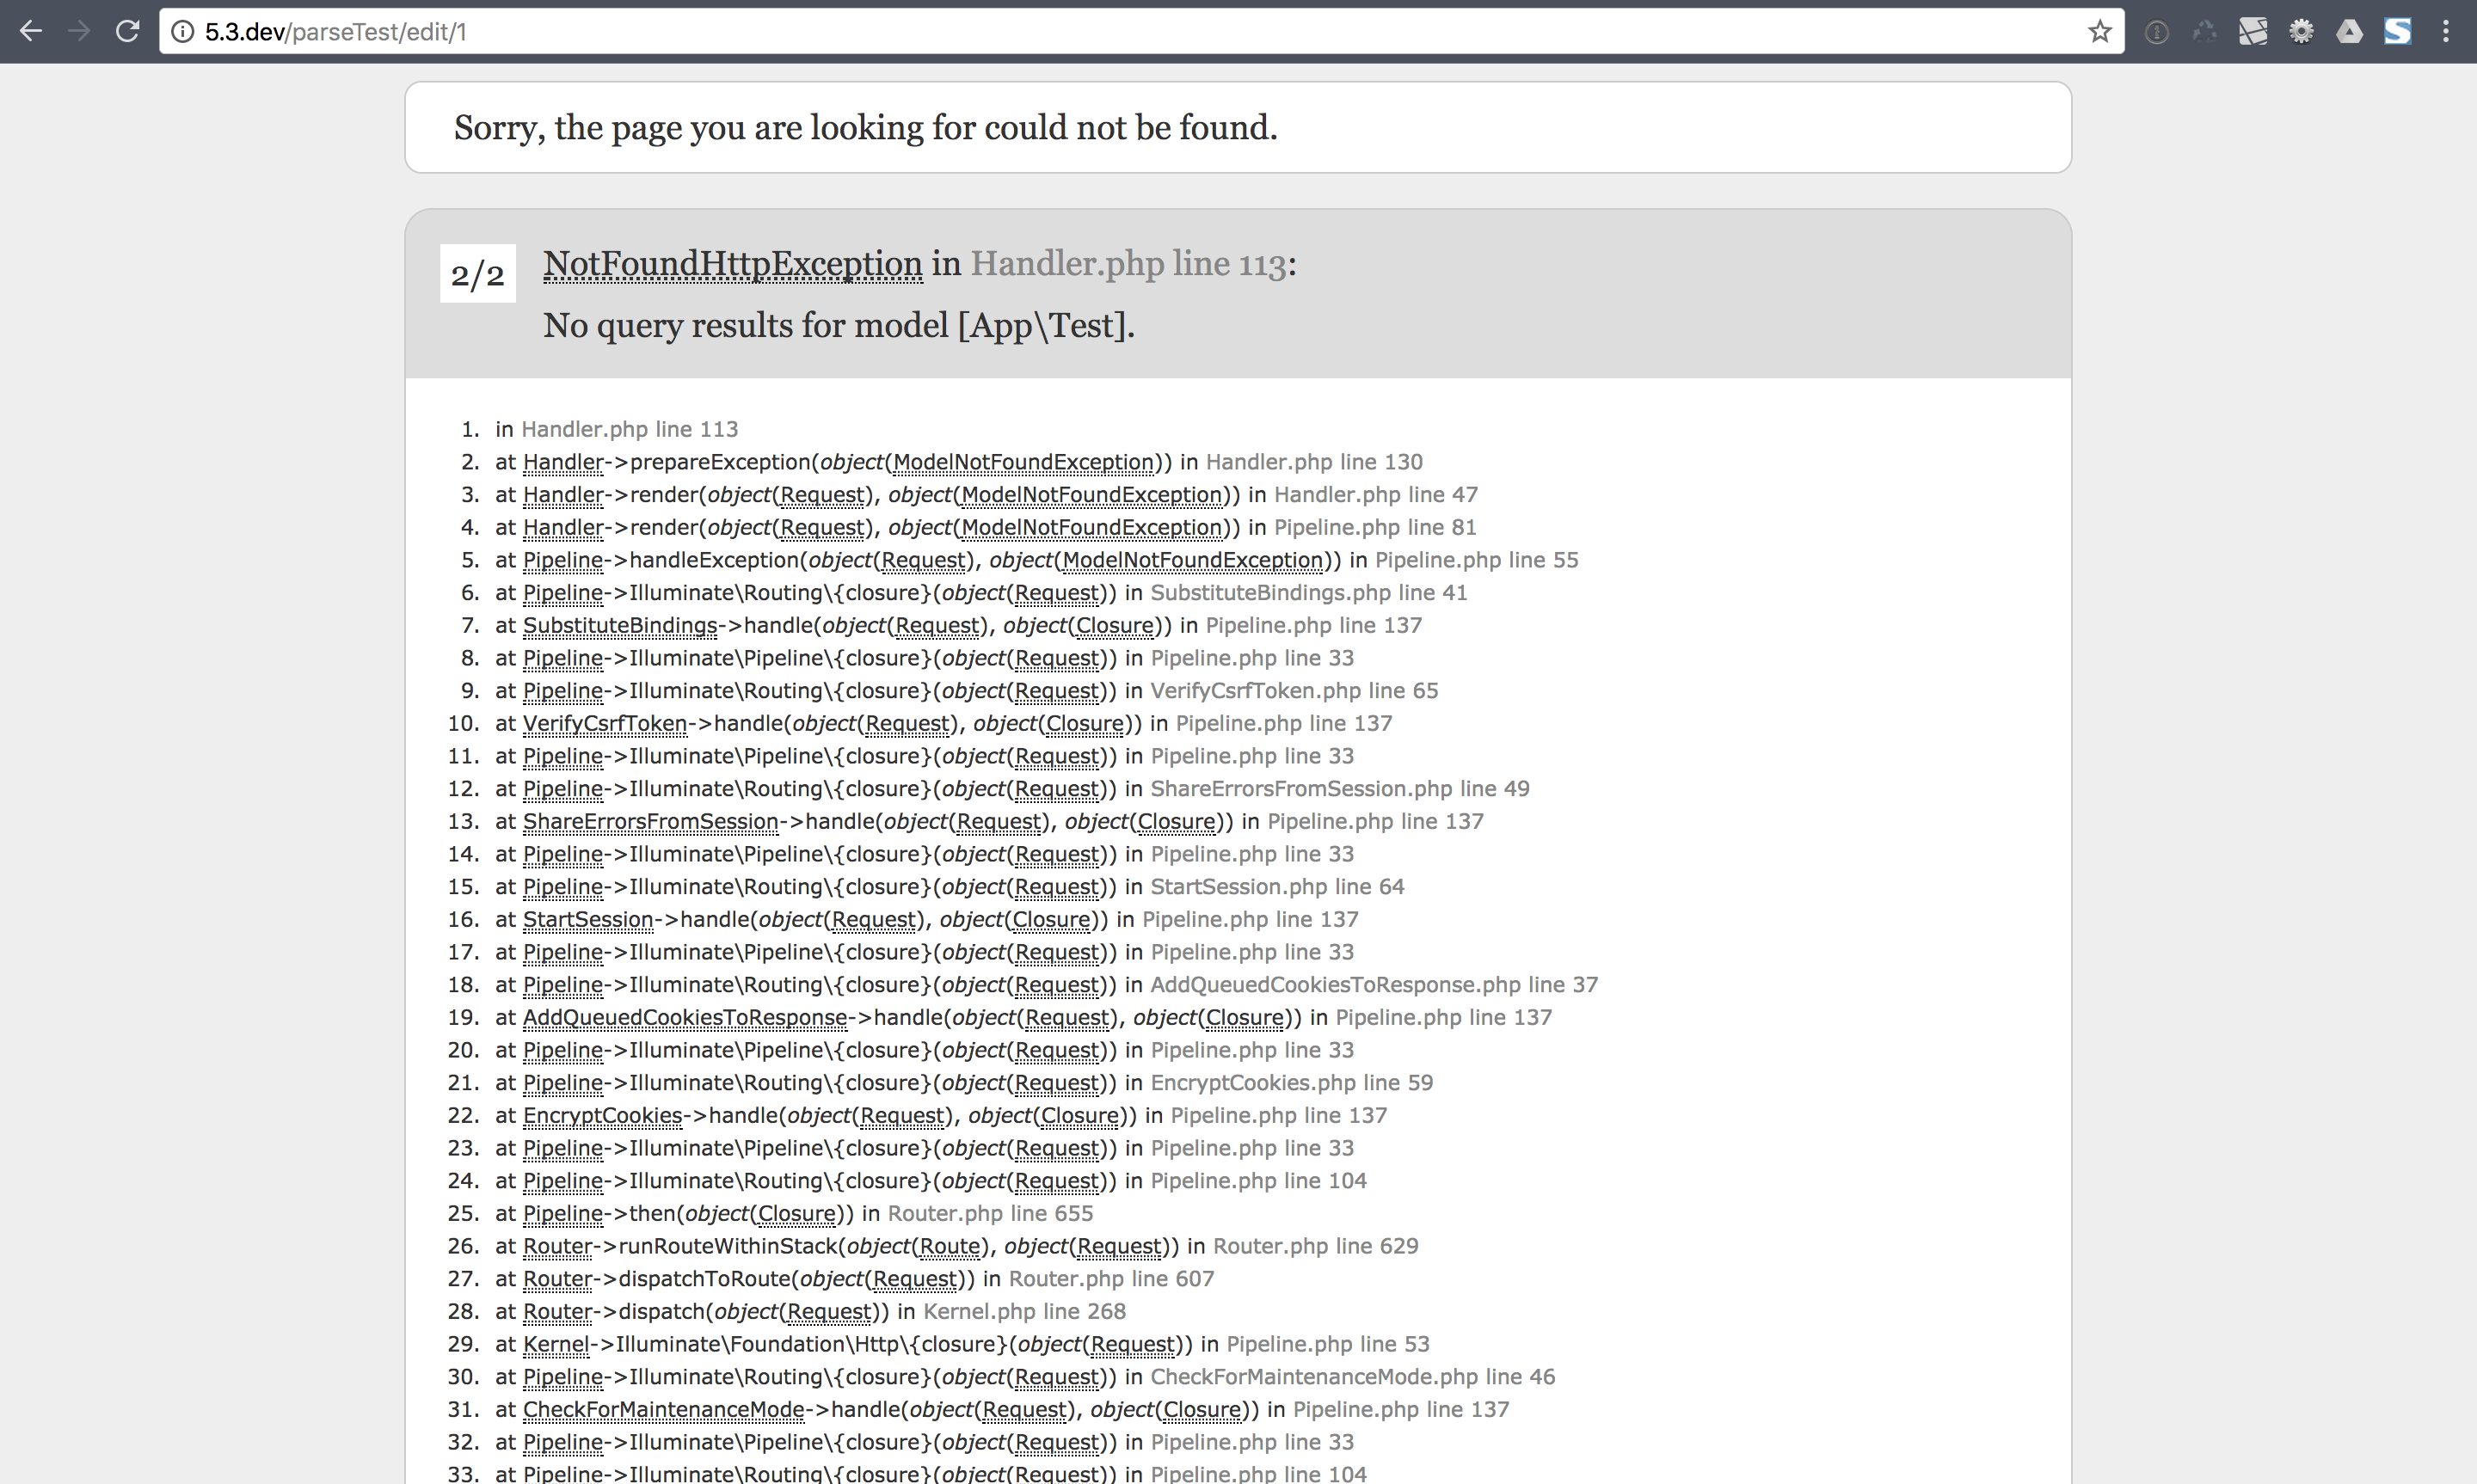
You can catch this exception and do some further stuff or ignore it completely. Please read more about Laravel’s exception handling to get some ideas what you can do with exceptions like them: https://laravel.com/docs/5.3/errors#introduction.
Step-04: Delete Entry
Last but not least lets remove the entry using the delete method. Again we are using the web route to delete the entry as we have seen before:
<?php

Route::get('/parseTest/delete/{id}', function ($id) {
    $parseTestClass = App\Test::findOrFail($id);
    $parseTestClass->delete();

    return 'DS ' . $id . ' has been removed!';
});
That’s it! The entry should be removed and we have covered a small bit of Laravel-Parse. I hope this gave you a quick overview about how Laravel-Parse works. But don’t worry there is even more to explore - so stick with me.